
How to Build the Perfect Pressure and Soft Washing Trailer
Building a perfect mobile trailer for pressure washing and soft washing isn’t just about loading up some tanks and hoses — it’s about building a system that’s reliable, efficient, and scalable. Whether you’re just starting out or leveling up, a well-designed trailer is one of the best investments you can make for your business.
Let’s dive into what it takes to build a professional wash rig like the ones trusted by the pros.
Why a Purpose-Built Trailer Matters
- Faster job setups and cleanups
- Professional image that wins bigger clients
- Equipment protection and longer lifespan
- Maximized chemical usage and water management
- Seamless transition between soft washing and pressure washing
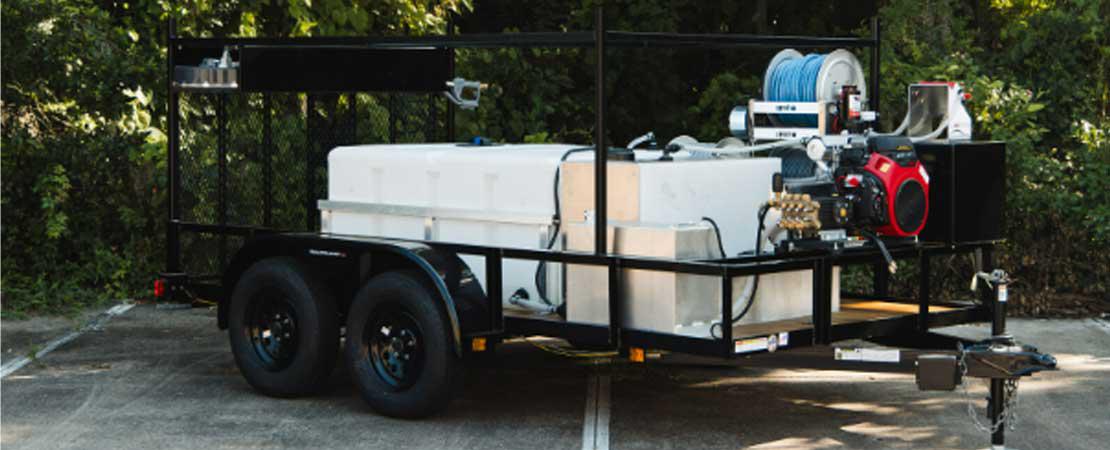
Step 1: Start with the Right Trailer Platform
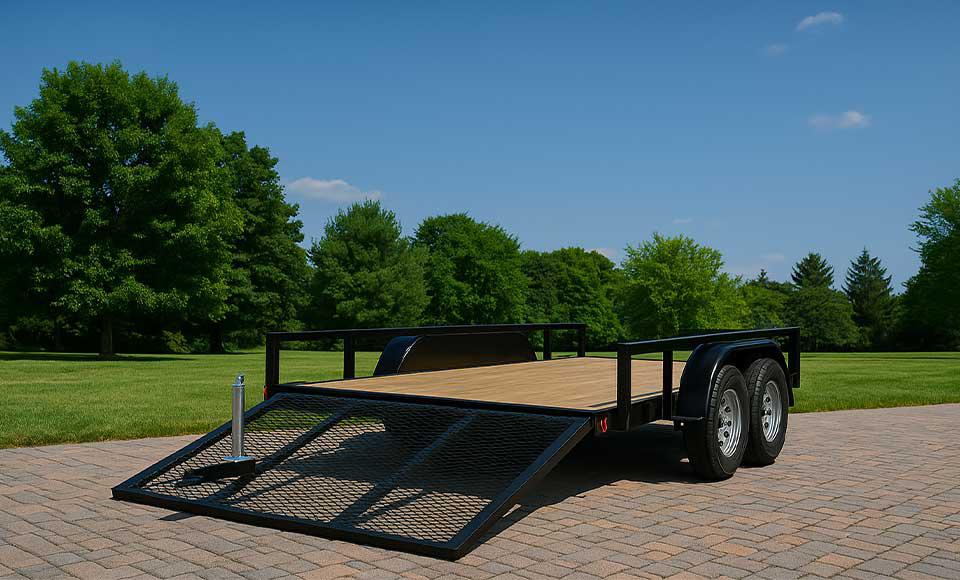
Professional builds typically used:
- Heavy-duty tandem axle trailers (for better weight distribution)
- Steel or aluminum construction for durability
- Brake-equipped axles for towing safety
- Water containment systems when needed for environmental regulations
Key Tip:
Choose a trailer that can easily support the weight of:
- Full water tanks (up to 525+ gallons)
- Equipment skids
- Hoses, reels, and chemical drums
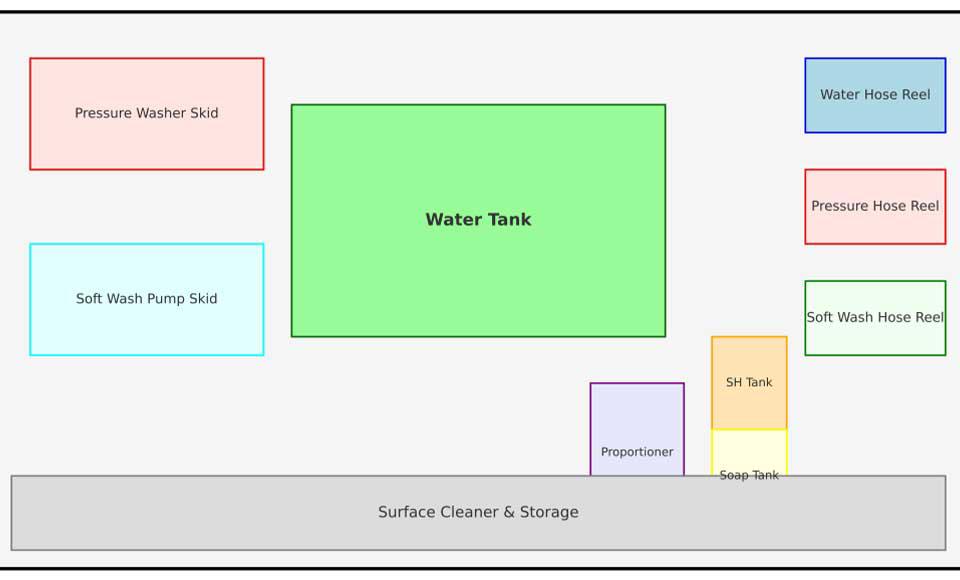
Step 2: Install the Core Systems
The ideal trailer combines both pressure washing and soft washing systems, ready to tackle any job.
Essential Equipment:
- Pressure Washer Unit (typically 5.5 GPM @ 3,500 PSI or more)
- Soft Wash System (12V or gas-powered diaphragm pump system)
- High-capacity Water Tank (200–525 gallons)
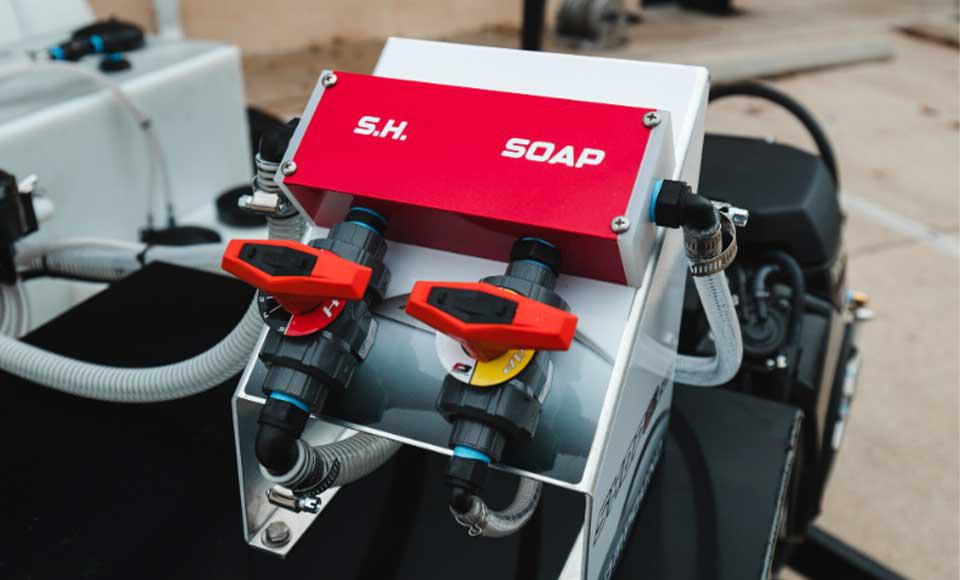
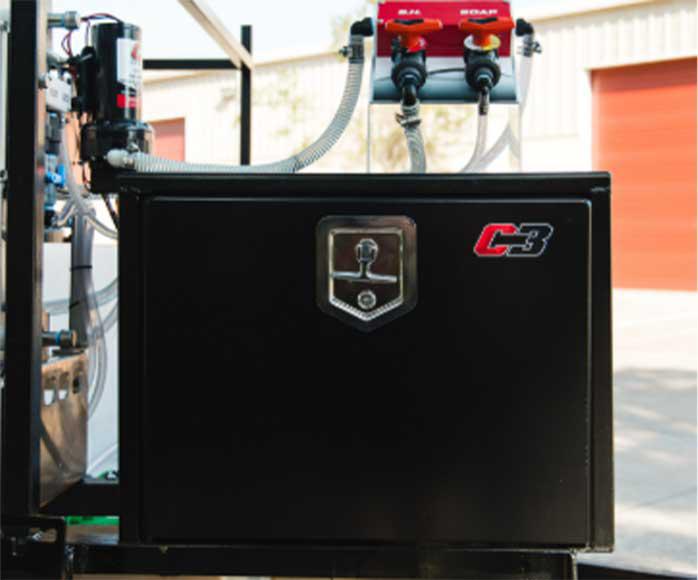
- SH (Sodium Hypochlorite) Tank (35–55 gallons)
- Soap/Sufactant Tank (15+ gallons)
Step 3: Add Hose Management Systems
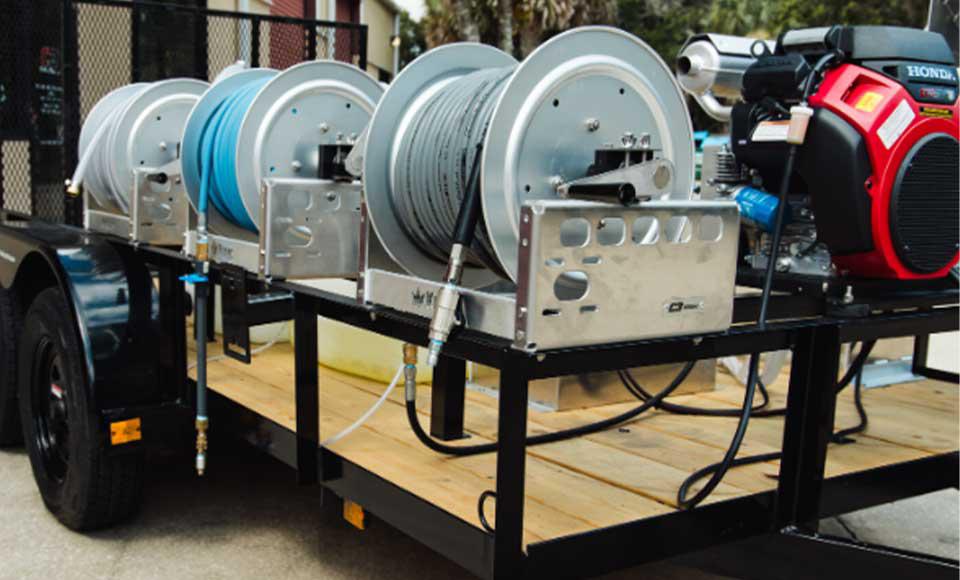
Efficient hose management means faster setups and no wasted time fighting tangled lines.
Recommended Reel Setup:
- High-Pressure Hose Reel (200–300 feet)
- Soft Wash Hose Reel (200–300 feet)
- Fill Hose Reel (for bulk water transfer)
All reels should be mounted securely and preferably use locking mechanisms to prevent hose movement during transit.
Step 4: Power, Plumbing, and Flow
Professional builds optimize water and chemical flow for maximum performance:
- Plumb tanks with poly fittings and bulkheads
- Install 3-way ball valves for easy switching between tanks
- Add water filters at the pump inlets
- Use bypass plumbing to reduce pressure wear on soft wash pumps
Electrical Power Setup:
- Deep Cycle Battery Box for 12V systems
- Solar panel trickle chargers to maintain battery health
- Lighting for early morning or night jobs (especially inside enclosed trailers)
Step 5: Trailer Layout Strategy
A well-thought-out layout can save you hours every month.
Smart Layout Basics:
- Place the water tank near the center of the trailer, over the axles.
- Mount reels at the rear door or open sides for quick deployment.
- Store chemicals close to the soft wash proportioner system.
- Keep a clear walking path for safety and efficiency.
Step 6: Safety and Branding
You’re not just building a tool—you’re building your brand.
- Add fire extinguishers and spill kits
- Use non-slip floors or mats
- Apply company decals or wraps for marketing while you drive
- Include lockable toolboxes for gear security
| Setup Type | Estimated Cost |
|---|---|
| DIY Basic Trailer Build | $8,000–$12,000 |
| Semi-Custom Professional Rig | $15,000–$20,000 |
| Full Custom Pro Build | $25,000+ |
Final Thoughts
A professional pressure and soft washing trailer isn't just about getting the job done—it’s about getting it done faster, safer, and better.
Whether you’re investing in your first real setup or upgrading to a top-tier rig like the C3 Skids Trailer, quality pays off.
Take the time to build it right—and let your trailer do the heavy lifting for your business growth.
Call to Action
Need help setting up your mobile wash rig?
LNI Equipment has you covered with:
- Trailer setups (pressure and soft washing ready)
- Pumps, tanks, hose reels, proportioners
- Expert advice on trailer builds and layouts
Visit: https://lniequipment.com
Call/Text: 732‑522‑8880
Email: contact@lniequipment.com