
Installation Essentials: Pro Tips for Setting Up Your Pressure Washer System
Whether you’re setting up a fixed pressure washer, equipping a mobile trailer, or building a shop
rig, proper installation is vital for long-term performance, safety, and ease of use. This guide
walks you through a streamlined installation process, based on years of industry insight and
real-world use.
rig, proper installation is vital for long-term performance, safety, and ease of use. This guide
walks you through a streamlined installation process, based on years of industry insight and
real-world use.
1. Evaluate Your Space First
Start with a site assessment to ensure a smooth installation process. Consider:
- Electrical access: Is the plug location sufficient for your unit’s power needs?
- Water supply: Is there a reliable 4+ GPM line nearby?
- Ventilation: Especially important for indoor or enclosed setups.
- Layout traffic flow: Prevent hose or footprint interference during operation.
2. Create a Tailored Design
Whether you’re setting up at home or configuring a mobile wash rig, a plan ensures efficiency:
- Define system layout: Determine positions for pump, tanks, hose reels, and detergent injectors.
- Plan workflow: Place reels, power, and water at logical points to reduce hose clutter and travel time.
- Safety features: Consider slip-resistant surfaces, secure mounting, and accessible shut-off points.
Need design support? LNI provides custom rig layouts, skid builds, and trailer-ready platforms
3. Secure Your Core Components Installation should start with proper mounting:
- Fix the pump base: Ensure a stable, level surface to reduce vibration.
- Anchor tanks safely: Strap or bolt SH, water, and soap tanks to avoid shifting during transport.
- Rout the hoses methodically: Use clamps or guards to prevent cruising or hose damage.
4. Connect Utilities With Precision A reliable system depends on clean power and water connections:
- Water line: Use a fast-flow garden hose or plumb in direct feed—verify GPM capacity.
- Power source: Use GFCI-protected outlets for electric systems, and ensure proper grounding.
- Optional: Install remote or panel switching for safety and workflow control.
5. Outfit With Functional Accessories A smart system isn’t complete without practical components:
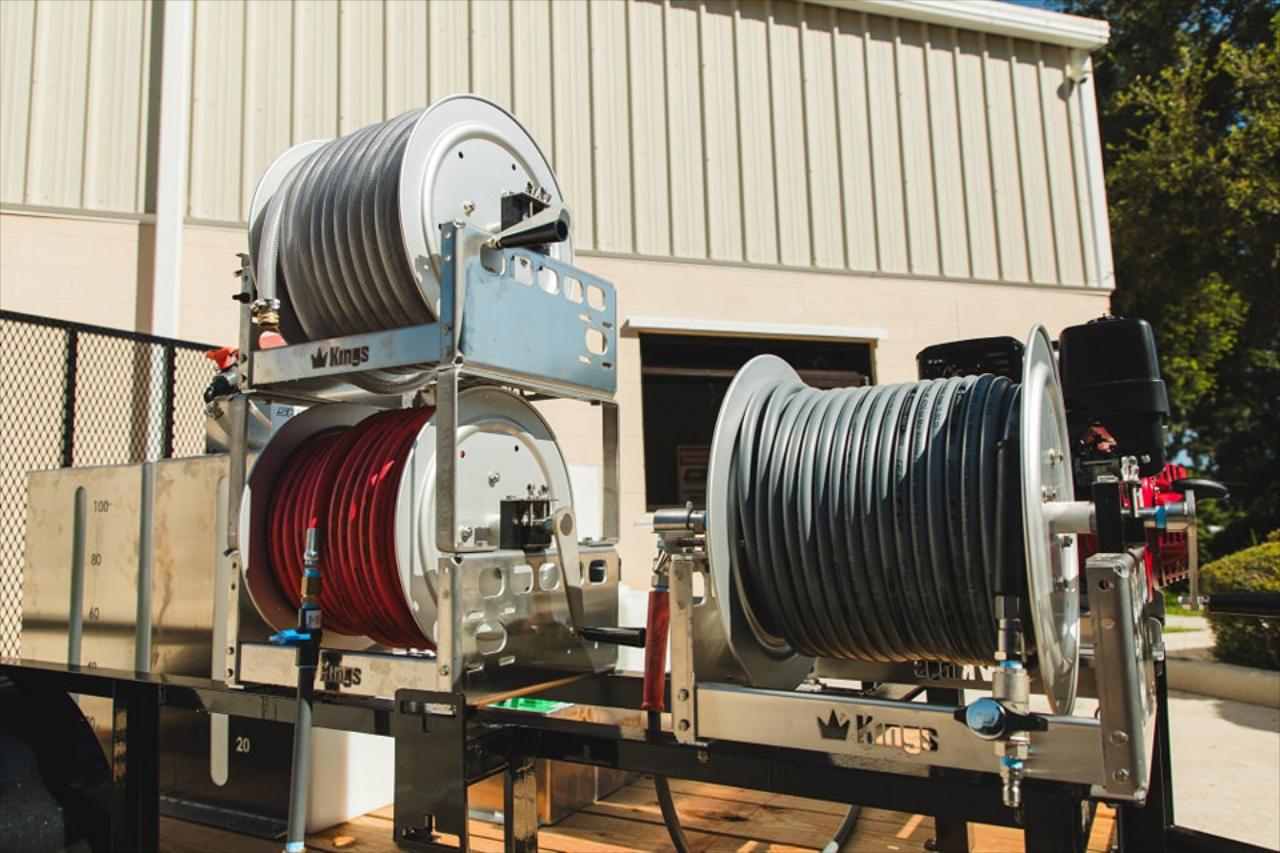
- Hose reels: Maintain organization and reduce wear.
- Wands and nozzles: Calibrate for each cleaning task—stock colored tips for easy access.
- Injection systems: Proportioners or downstream injectors maintain consistent chemical delivery.
- Surface cleaners: Cut job time significantly on wide, flat areas.
LNI offers a full suite of accessories to enhance system efficiency
6. Commission and Test the System Before field use, validate every function:
- Turn on water and bleed air through hoses.
- Start the engine or motor and gently test spray lines.
- Check for leaks, verify flow rates, and run each nozzle under load.
- If applicable, test remote switching and automatic shut-off functions.
7. Train Operators
Even the best setup fails without proper operator training. Teach your team to:
- Prime and start the system safely.
- Choose correct nozzles and spraying patterns.
- Shut down the system and store hoses properly.
- Watch for warning signs like overheating or pressure loss
Final Thoughts
Whether setting up a shop-based system, mobile trailer, or residential rig, a proper installation defines the difference between efficiency and endless frustrations. By planning your layout, securing connections, and training your team, your equipment will deliver consistent performance for years.
Need help designing your next pressure washer setup?
LNI Equipment offers:
- Custom trailer and skid solutions
- Accessories like hose reels, injectors, surface cleaners
- Full chemical and pump packages
- Expert guidance from pros who field-test these systems daily
Visit: lniequipment.com
Call/Text: 732-522-8880
Let us help you build a system that works as hard as you do.
Call/Text: 732-522-8880
Let us help you build a system that works as hard as you do.